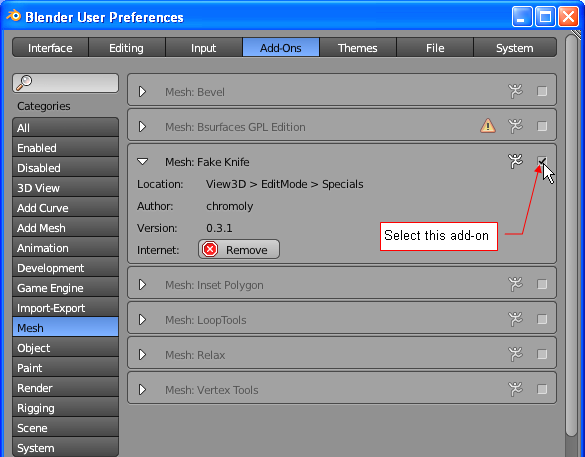
To use the Fake Knife command, activate Fake Knife add-on (you will find it in the Mesh category) (Fig.1):
|
Blender 2.5 has the knife tool, but it allows to use only the freehand drawn “cutting line”.
It is very difficult to adapt this tool for the precise modeling of an airplane or a car.
Fortunately, there is an add-on, which allows drawing the cutting line with the straight segments.
It was written by the programmer having the nick chromoly.
It seems that he did not have his own portal, so it was difficult to get the actual version of his script.
That is why I have decided to host this add-on on my pages, as long, as there is no "straight line" knife in Blender.
Here you can download the mesh_knife.py add-on file.
To follow this tutorial, you should install this add-on into your Blender environment. (Here is the tutorial, which explains how to do that).
To use the Fake Knife command, activate Fake Knife add-on (you will find it in the Mesh category) (Fig.1):
|
|
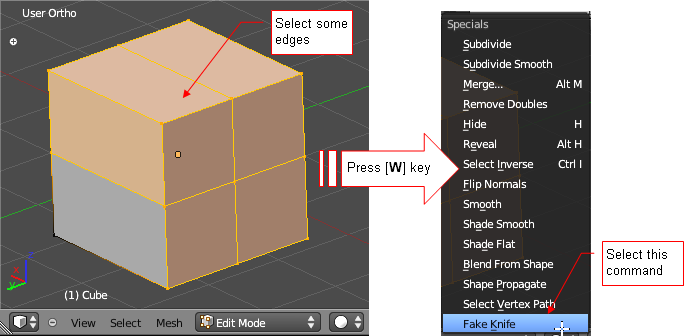
In Edit Mode select the edges, you want to bevel (Fig. 2), then press [W] key, to open the Specials menu:
|
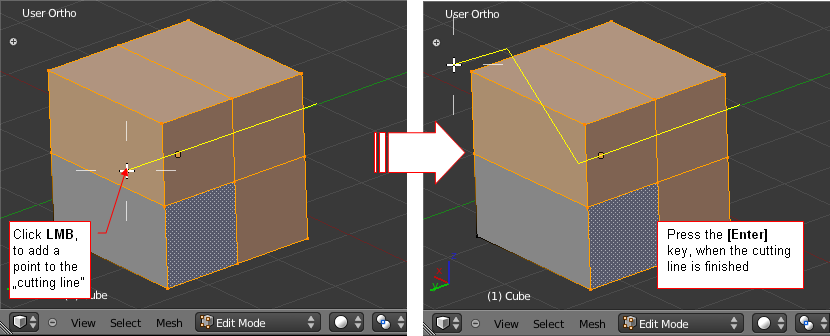
Select the Fake Knife command from there. The knife cursor will appear on the screen. Use it to draw the “cutting line” on the screen (Fig. 3):
|
When the line of the cut is ready, press the [Enter] key, and you will see the result (Fig. 4)
|
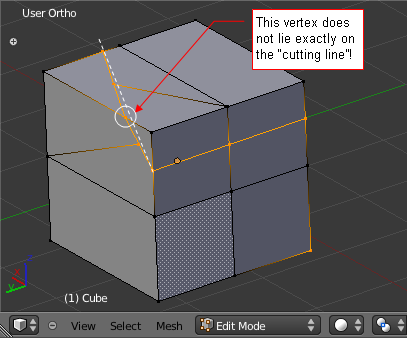
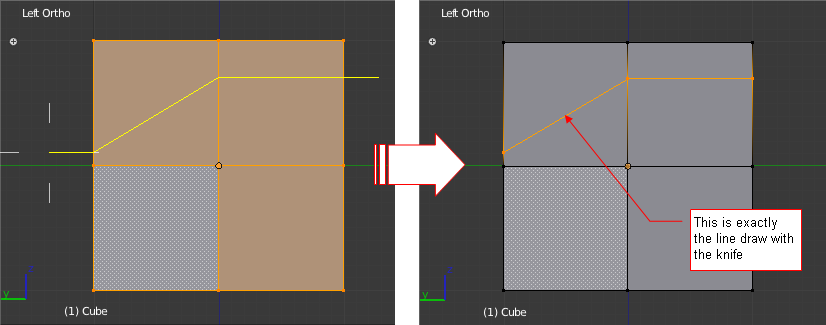
Notice that one of the vertices does not lie exactly on the line we have drawn. It may be the defect of the Blender knife command (this add-on uses it internally). Fortunately, for the precise modeling we will use this tool in the left, top or front view. It works perfectly there (Fig. 5):
|