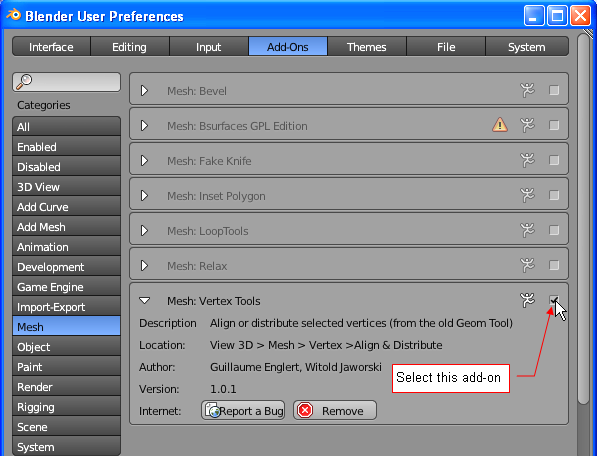
To use the Vertex Tools commands, activate Vertex Tools add-on (you will find it in the Mesh category) (Fig.1):
|
This add-on contains three vertex operations, ported from the Geom Tools script (used in Blender 2.4). They were just the most requested features, at least on my local Blender forum. Feel free to extend this add-on, porting the other original Geom Tools commands to Blender 2.8!
Here you can download the mesh_vertex_tools.py add-on file for Blender 2.8.
Here you can download the mesh_vertex_tools.py add-on file for previous Blender versions (2.5 - 2.7).
To follow this tutorial, you should install this add-on into your Blender environment. (Here is the tutorial, which explains how to do that. NOTE: the pictures were made in Blender 2.7).
To use the Vertex Tools commands, activate Vertex Tools add-on (you will find it in the Mesh category) (Fig.1):
|
|
If you want to activate it permanently in Blender 2.7 and earlier versions, use Save User Setings button.
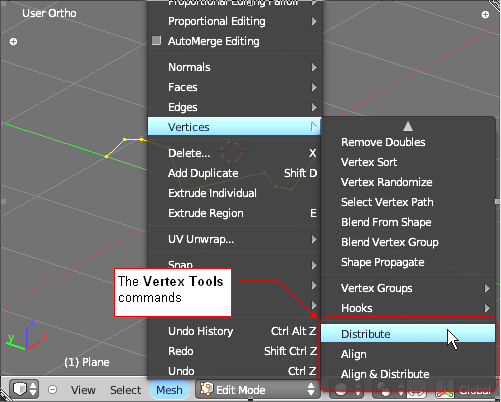
In Edit Mode select the edge, you want to change. Operations, implemented by this add-on in Blender 2.7 were available in the Mesh=>Vertices menu (Fig. 2), while in Blender 2.8 you can find them in the Vertices menu.
|
There are three new commands, at the bottom of the Vertices menu/submenu (Fig. 2):
They are described on the pictures below:
|
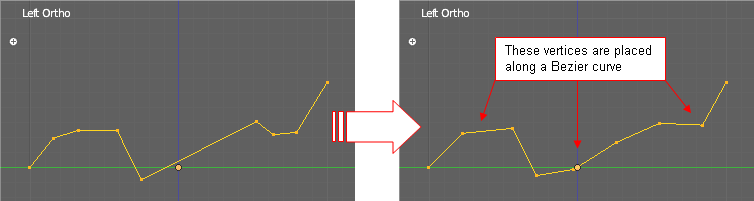
This command “relaxes” the selected edge loop. The inner vertices are placed along a Bezier Curve that approximates the original line. In this new shape, the lengths of the subsequent edges are more equalized.
|
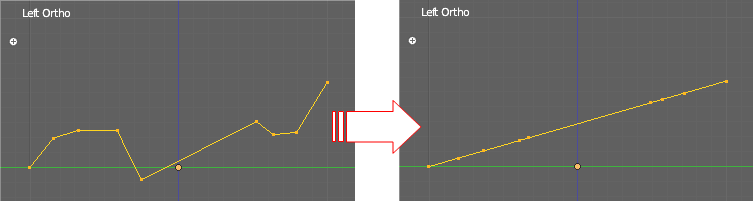
This command places all selected vertices on a straight line, running from the first to the last vertex. Notice, that the distances between the vertices, measured along this line, are preserved.

|
This command places all selected vertices on a straight line, running from the first to the last vertex. All edges of this loop have equal length.
This simple tool does not take into account the topological connections between selected points: for it they are just a "cloud of points". Thus, it always align or distribute the selected points along the line connecting two most distant points from the selected set.