To use the Bevel command, activate Bevel add-on (you will find it in the Mesh category) (Fig.1):

|
Blender 2.5 is missing some important features. One of them is so called “destructive Bevel” command. (It has Bevel modifier, only). This add-on is one of the few attempts to implement this feature.
NOTE: in Blender 2.63 the Bevel command is back. However, this standard command produces for an open edge loop a chamfer that has variable angle, which is not proper for the machine parts or architecture. Thus this add-on still is needed, as long as the standard Bevel command is not fixed. The pictures below were created in earlier Blender versions. In 2.63 this add-on fully uses the n-gon feature and does not produce any unwanted traingles!Here you can download the mesh_bevel.py add-on file.
To follow this tutorial, you should install this add-on into your Blender environment. (Here is the tutorial, which explains how to do that).
To use the Bevel command, activate Bevel add-on (you will find it in the Mesh category) (Fig.1):
|
|
If you want to activate it permanently, use Save User Setings button.
In Edit Mode select the edges, you want to bevel (Fig. 2), then press [W] key, to open the Specials menu:
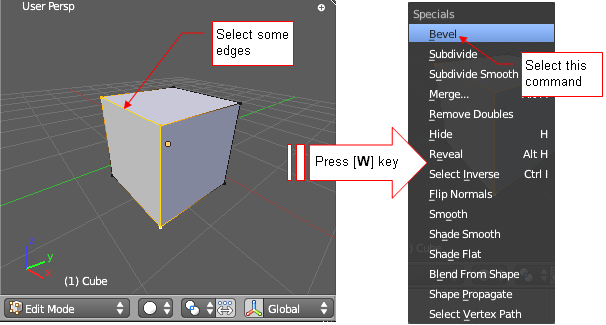
|
Select the Bevel command from there. Initially it will bevel selected edges with default width. (This is the width used in the previous operation).
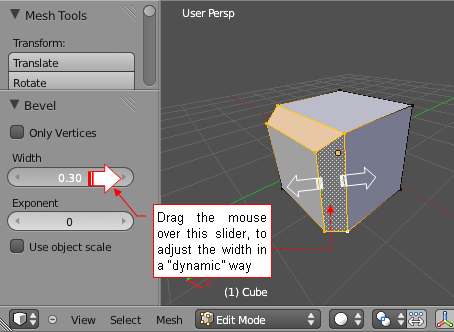
If you want to adjust it, press [T] key, to open the Tool Properties pane (Fig. 3):

|
You can change the current bevel width using the Width control (Fig 4):
|
Every change of the value here is immediately displayed on the screen. You can adjust the bevel width in a “dynamic” way, just dragging the mouse (with LMB pressed) over the Width control.
|
Usually you will not need to change two other controls, associated with the Bevel width value. Nevertheless, you should know what they do:
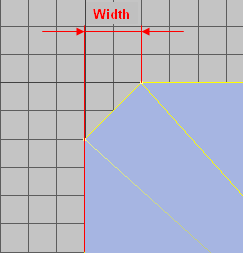
Beware, that the Width value is not the width of the new face. It is the width of its side view (Fig 5):
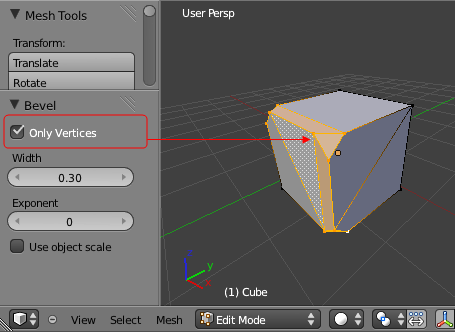
The Only Vertices option allows you to bevel just the ends of the edges (Fig. 6):
|
NOTE: Since Blender 2.63 this command creates n-gons instead of the unwanted triangles (this picture was made in an earlier Blender version)