<?xml version='1.0' encoding='utf-8' ?>
<?xml-stylesheet type="text/xsl" href="header_e.xsl" ?>
<body PageTitle="How to align current view to the selected object" PageHeader="Tutorials">
<br/>
<div>
<p>
There is a standard command in 3D View window (Object mode): <b>View=>Align View=>Align View to Selected</b>. 
So, why I have created this script? Well, this standard command has two important drawbacks:
<li>It aligns view always to the object’s local XY plane. It is impossible to align it to any other plane;</li>
<li>The alignment is not set properly, when one of the object’s scale factors is negative;</li>
</p>
</div>
<div>
I have written this script as a workaround these two shortcomings.
</div>
<div>
<p><a href="downloads/scripts/AlignView.py">Here</a> you can download the <b>AlignView.py</b> script file.</p>
<p>
To follow this tutorial, you should place the Align View script into your Blender script directory (here is the <a href="scripts-010_e.xml">tutorial</a>, 
which explains how to do that).
</p>
</div>

<br/>
<div class="subheader">Usage</div>
<div>
<p>
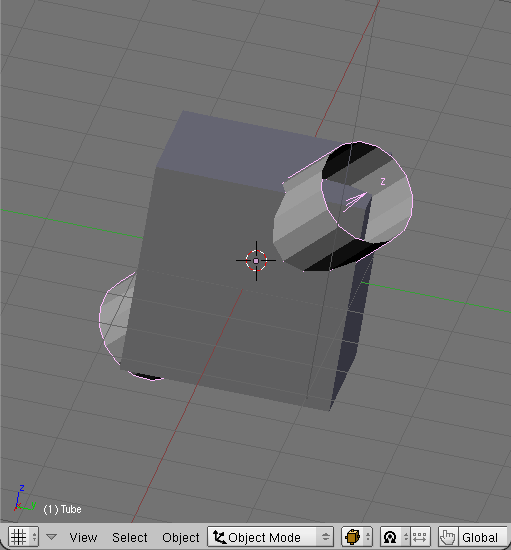
Let’s align view to the XY face of the Tube from the Fig 1.:</p>
<table cellSpacing="0" cellPadding="0pt" align="left">
	<tr align="center" valign="top">
		<td>
			<A href="images/scripts/020/image01.png" target="_blank" title="click to see larger image">
				<IMG src="images/scripts/020/image01s.png" align="center"/>
			</A>
		</td>
	</tr>
	<tr align="center" valign="top">
		<td><spanl>Fig. 1. Selected object (the unselected cube is aligned to the world system).</spanl></td>
	</tr>
</table>
</div>
<divf/>
<div>
<p>Select the object, first.
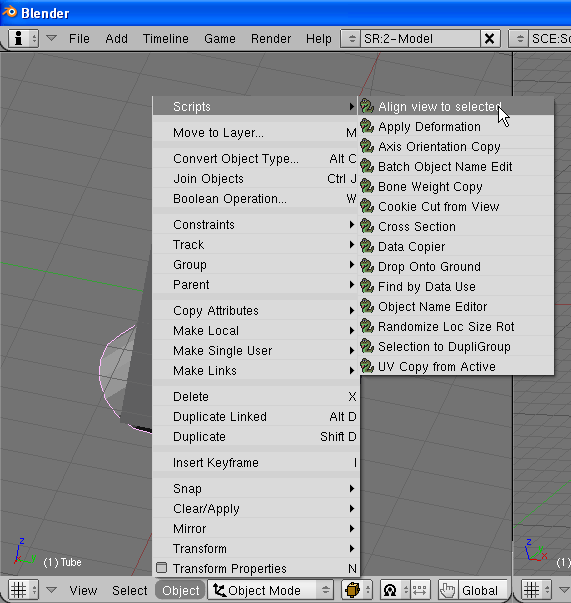
</p>
<p>Then run the <b>Object=>Scripts=>Align View to Selected</b> command (Fig. 2):</p>
<table cellSpacing="0" cellPadding="0pt" align="left">
	<tr align="center" valign="top">
		<td>
			<A href="images/scripts/020/image02.png" target="_blank" title="click to see larger image">
				<IMG src="images/scripts/020/image02s.png" align="center"/>
			</A>
		</td>
	</tr>
	<tr align="center" valign="top">
		<td><spanl>Fig. 2. Run the Align View to Selected script.</spanl></td>
	</tr>
</table>
</div>
<divf/>
<div>
<p>
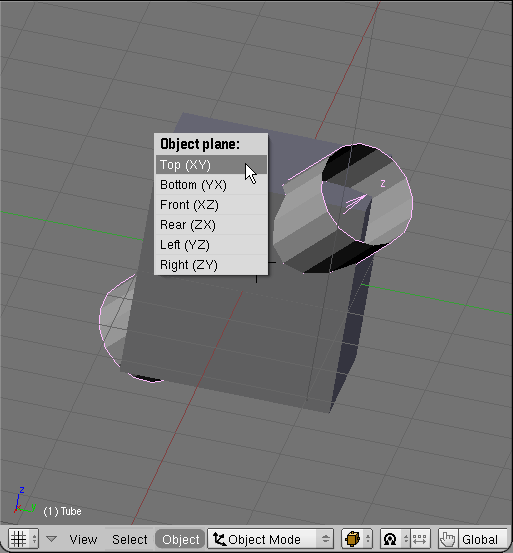
A popup menu will appear (Fig. 3). Select from it the desired plane:</p>
<table cellSpacing="0" cellPadding="0pt" align="left">
	<tr align="center" valign="top">
		<td>
			<A href="images/scripts/020/image03.png" target="_blank" title="click to see larger image">
				<IMG src="images/scripts/020/image03s.png" align="center"/>
			</A>
		</td>
	</tr>
	<tr align="center" valign="top">
		<td><spanl>Fig. 3. Selection of the alignment plane.</spanl></td>
	</tr>
</table>
</div>
<divf/>
<div>
<p>
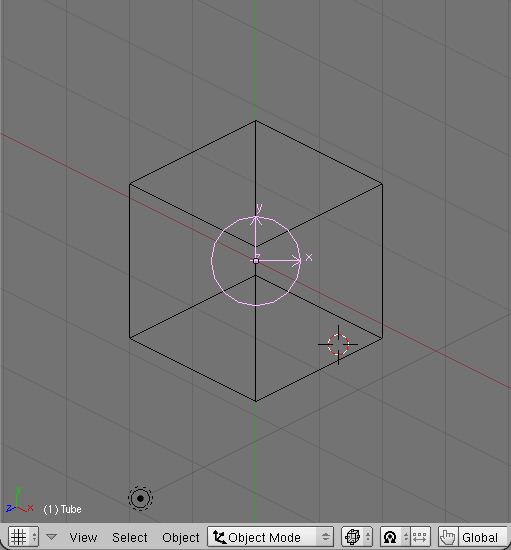
And here is the result (Fig. 4). I have switched into wireframe mode, to show it better:</p>
<table cellSpacing="0" cellPadding="0pt" align="left">
	<tr align="center" valign="top">
		<td>
			<A href="images/scripts/020/image04.png" target="_blank" title="click to see larger image">
				<IMG src="images/scripts/020/image04s.png" align="center"/>
			</A>
		</td>
	</tr>
	<tr align="center" valign="top">
		<td><spanl>Fig. 4. View aligned to the XY plane.</spanl></td>
	</tr>
</table>
</div>
<divf/>
<div>
<p>If you select from the popup menu (Fig. 3) another plane – let’s say, XZ – the result will be following:</p>
<table cellSpacing="0" cellPadding="0pt" align="left">
	<tr align="center" valign="top">
		<td>
			<A href="images/scripts/020/image05.png" target="_blank" title="click to see larger image">
				<IMG src="images/scripts/020/image05s.png" align="center"/>
			</A>
		</td>
	</tr>
	<tr align="center" valign="top">
		<td><spanl>Fig. 5. View aligned to the XZ plane of the selected object.</spanl></td>
	</tr>
</table>
</div>
</body>
